
Guide to replacing tap valves and tap cartridges
Tap Valves
Tap valves (sometimes called heads, glands or inserts) come in the following types:
- Ceramic Disk Valves - Quarter turn required to open/close the valves. Always come as handed pairs – left opening for the hot side/ right opening for the cold. Most valves have 20 teeth on the spline however some valves will have 18 splines or 24 splines.
- Compression Valves – rubber washer on the bottom that requires 2-3 full turns to open or close the tap – these are universal and fit either hot or cold sides.
These valves are for taps with 2 separate handles, one controlling hot and the other cold. Although not exclusive, the table below shows the common sizes of valves fitted in different types of taps. The 3 sizes below refers to BSP thread sizes rather than imperial measurements.
What does BSP mean? BSP or British Standard Pipe is an industry wide term with most basin taps using 1/2" BSP and bath taps 3/4" BSP thread sizes.
| Caravan Size | Basin | Kitchen Taps | Bath Taps | Bath Mixer Taps | |
| 3/8" | Y | ||||
| 1/2" | Y | Y | Y | Y | |
| 3/4" | Y | Y |
Signs that suggest your valves may need replacing:
- Intermittent dripping
- A constant leak, even when the tap is fully shut
Note: Before replacing your valve, it is worth taking out the valve, cleaning it and then refitting it as this may save buying a new one.
Tip: before starting, put the plug in your waste to avoid losing small parts down the drain!
Tools needed
Screw driver
Spanner
Replacement valve
Replacing Your Valves
Note: If in doubt, please get a qualified plumber to fix your tap.
- Switch off the water to your tap from either the mains or the isolation valve under the sink (otherwise you’ll get soaked)
- Remove the handles from on top of the valve
- Once the valve is exposed, use a wrench or spanner to grip the hexagonal nut on the valve and turn anti-clockwise to undo
- We suggest you use a soft cloth between the spanner and tap to avoid marking it
- Hold the tap body to prevent it rotating and getting damaged
- The valves may require some initial force or use of some grease or silicone as they may be stiff due to limescale build up etc
- Once the valves are removed clean any debris from inside the taps and remove any built up limescale
- Screw the valves back in, turning them clockwise to tighten
- The hot should always be on the left side
- The valves should be tight enough that they do not undo with hand pressure but do not overtighten more than required to fit them securely
- Turn on the water and test to see that the valves are functioning correctly – adjust if necessary. If any water escapes from the join between the valve and the tap body, gently tighten until the join is watertight
- Once you are satisfied that the valves are working, push the handles back on to the shaft of the valves and secure with the retaining screw

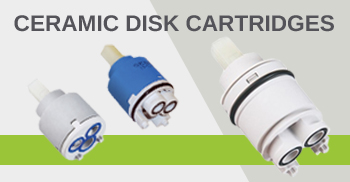
Tap Cartridges
The following are the most common ceramic disk cartridge sizes:
- 25mm, 35mm, 40mm
- All cartridges are operated by either single lever or by joystick
- Single lever cartridges control water flow together with temperature blending (left for hot and right for cold)
Signs that suggest your valves may need replacing:
- Intermittent dripping
- A continuous leak
Note: Before replacing your valve, it is worth taking out the valve, cleaning inside the tap and then refitting it as this may save buying a new one.
Replacing Your Cartridges
Note: If in doubt, please get a qualified plumber to repair your tap.
- Switch off the water to your tap from either the mains or the isolation ball valve under the sink (otherwise you’ll get soaked)
- Remove the lever from the cartridge (the most common method is to take out the colour indice as there is a grub screw behind which needs loosening
- Once you have undone the grub screw, remove the lever vertically from the top of the cartridge
- The cartridge will be held in place by a brass bush which will need to be undone anticlockwise
- Once it is undone, you can simply lift out the cartridge
- Place a soft cloth between any tools used and the tap to avoid marking the tap
- Hold the tap body to prevent it rotating whilst undoing the bush
- The cartridge and bush may both be stiff due to a build up of limescale and will need some initial force to loosen them
- Once the cartridge is removed clean any debris from inside the taps and remove any built up limescale
- Push the cartridge back in ensuring the locating lugs are positioned in corresponding holes in the tap
- Screw the bush back on to secure the cartridge
- Turn on the water and test to see that the cartridge functions correctly – adjust if necessary. If any water escapes from the tap body, gently tighten the bush until there are no further leaks
- Once you are satisfied that the cartridge is working correctly, screw on the cover cap that fits over the bush and refit the lever